

Did You Know?
Did you know that International Fairy Day is a relatively new festival, started in 1999 by artist Jessica Galbreth? It is a day meant to celebrate the mythical and magical in the world, and to use the stories of these creatures as an inspiration to children worldwide. The goal is to show them that anything is possible, and to reach for their goals, no matter how fantastical.

When to Celebrate
The date of June 24th was chosen for International Fairy Day because, according to the legends and folk stories, fairies are meant to be most active during the summer solstice. The solstice is the time of the year when they can most easily cross over from the magical realm and into the human world.
The Toolkit
To build your spinning fairy, gather these supplies:
-
The amomii Template: [GET THE FREE TEMPLATE HERE]
-
Cardstock or A4 Paper: (Use thicker paper for a stronger build)
-
Glue or Double-Sided Tape
-
Thick Double Tape
-
Scissors or Craft Knife (Safety First: Always ask an adult for assistance when using sharp cutting tools)
Materials
Corrugated Cardboard
-
5 mm thickness
-
2 mm thickness
Wooden Dowels
4 mm Diameter:
-
16 cm (1 piece)
-
18 cm (1 piece)
-
5 cm (1 piece)
3 mm Diameter:
-
4 cm (12 pieces)
Accessories
-
1 Plastic Straw (cut to length as needed)
-
Colored Paper (optional decorations)
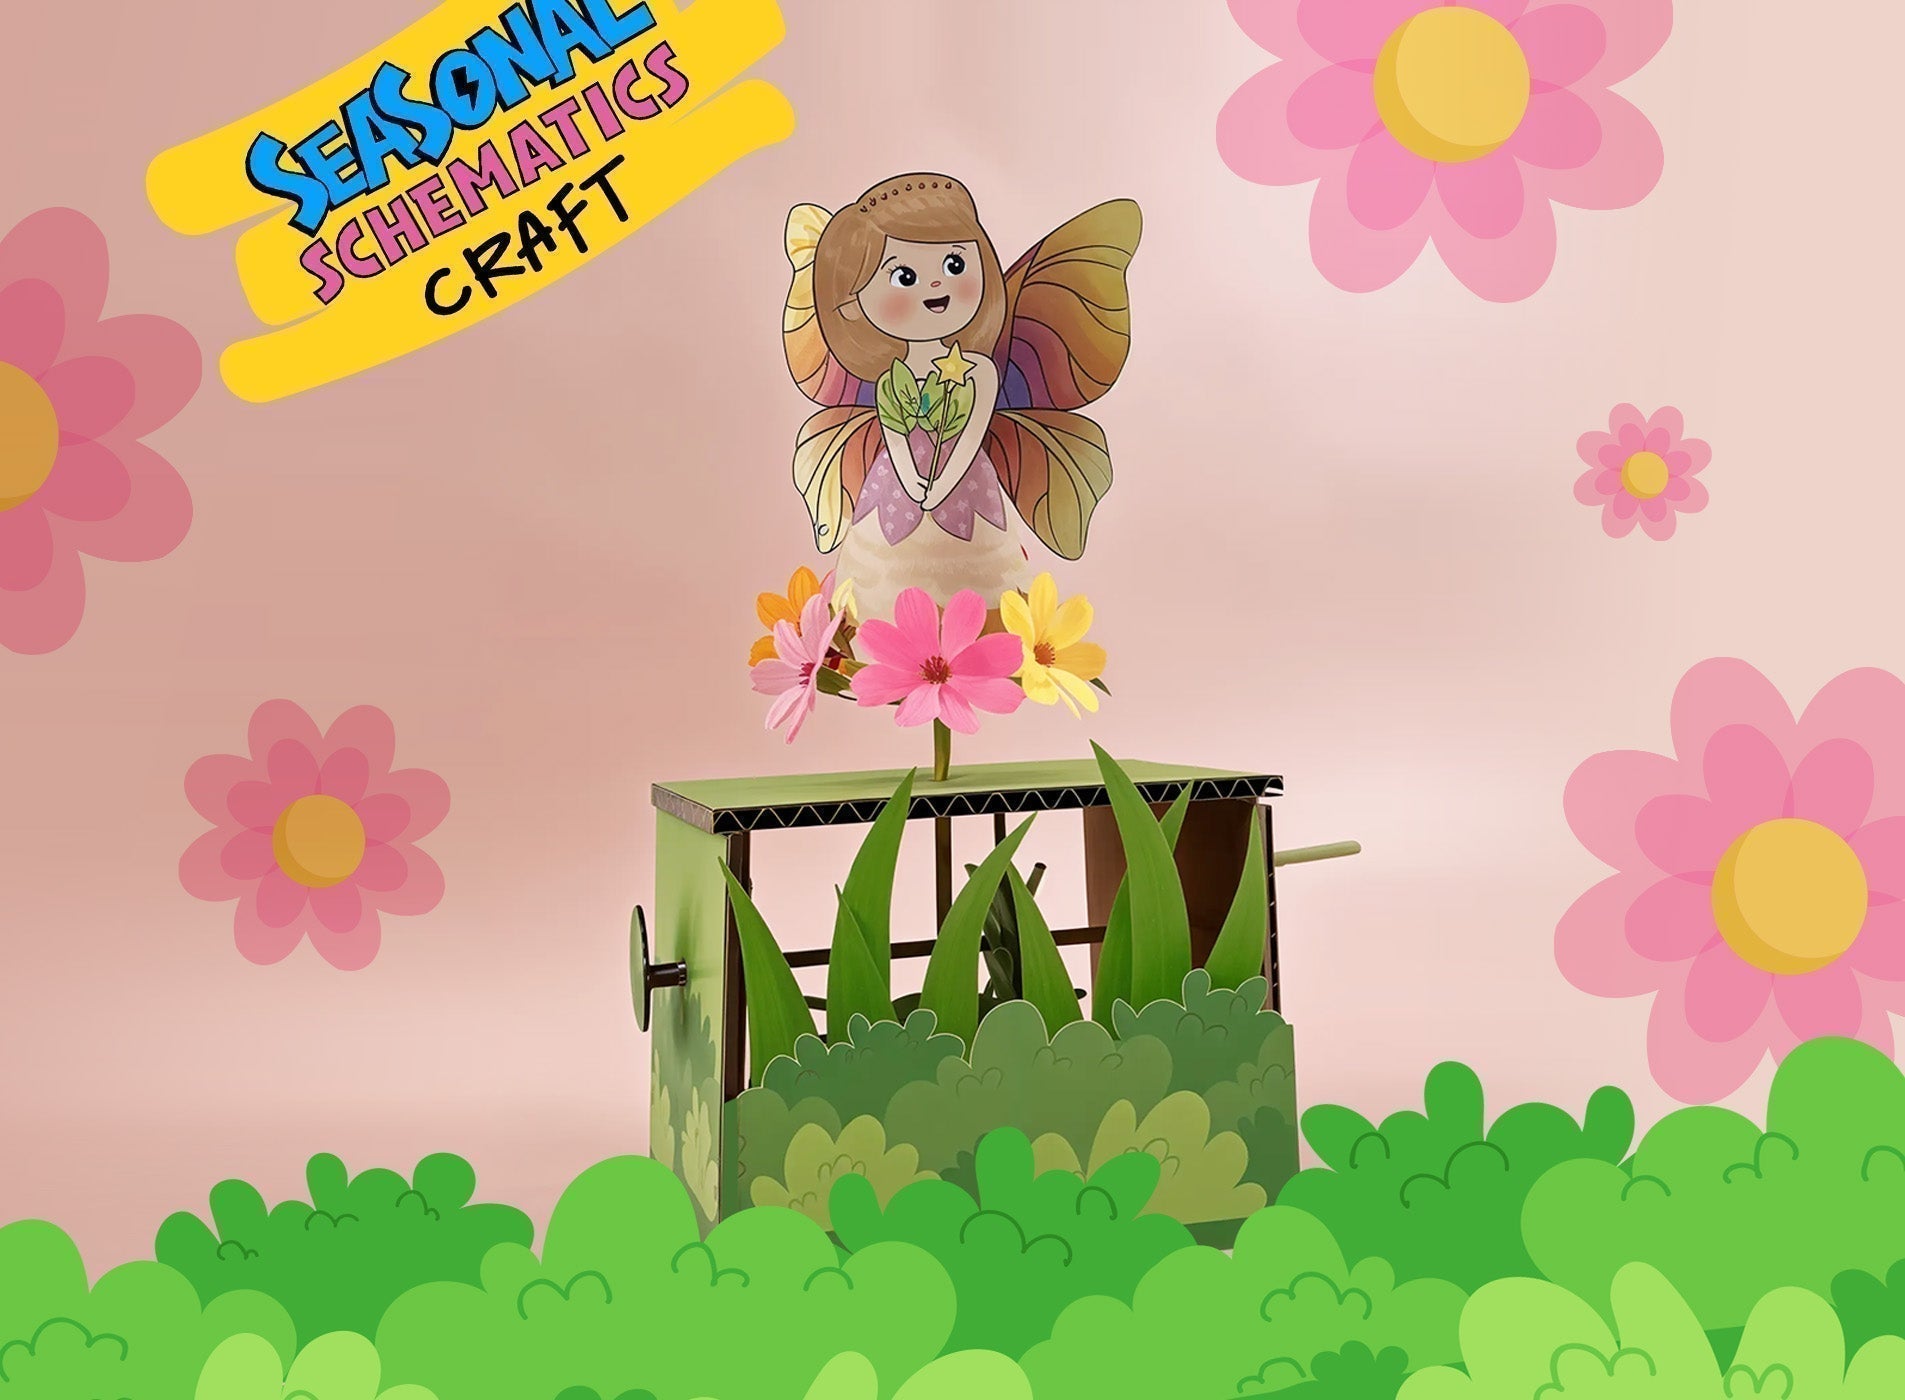
The Build: Step-by-Step
Phase 1: Print & Cut
1. Print and Prepare: Print your template and carefully cut out all the pieces.

Pay close attention to the template instructions showing which parts should be attached to cardboard for extra strength.
Phase 2: Build the Rotating Wheels
Prepare:
You will need 2 wheel mechanisms. For each wheel:
-
Prepare 2 cardboard circles
-
Prepare 6 pieces of 3 mm wooden dowels

2. Glue the 6 wooden dowels along the marked lines on one circle.

3. Then cover them with the second circle to form a wheel structure.

4. Repeat the same process to create the second wheel.

5. Insert Main Dowels
Make a hole in the center of each wheel:
-
Insert the 18 cm dowel into one wheel
-
Insert the 16 cm dowel into the other wheel
Do not glue them yet—just insert firmly.

Phase 3: Build the Main Body
Refer to the assembly image provided in the template for guidance.

6. Prepare the Base
-
Gather the cardboard body pieces that have a hole in the center of each piece.

-
Arrange the body structure with the cardboard parts and attach a piece of straw underneath the body as shown in the reference picture.

-
Glue the cardboard circle with a center hole onto the base.

7. Install the Vertical Mechanism
-
Insert a straw piece onto the 18 cm wooden dowel, then insert the dowel vertically through the center base.

8. Install the Horizontal Mechanism
-
Insert the 16 cm wooden dowel horizontally and add the wheel before inserting fully.

9. Adjust both wheel positions carefully and ensure they rotate smoothly. Once everything is aligned, carefully glue the wheels in place to keep them positioned correctly.

10. Attach 2 straw pieces along the sides of the body to help cover and support the wooden dowels.

Phase 4: Build the Handle Mechanism
Prepare These Parts
-
Large cardstock circle
-
Small cardstock circle
-
5 cm wooden dowel

Assembly Steps
11. Glue the Circles Together: Glue the small circle on top of the large circle.

12. Insert the Wooden Dowel: Insert the 5 cm wooden dowel into the side hole as shown in the template. Glue it securely.

13. Attach to the Body: Attach the mechanism to the right side of the Spinning Fairy body. Before fully gluing, check that the mechanism can still rotate smoothly.

14. Finish the Left Side: Glue another small circle onto the left side to complete the mechanism.

15. Cover the structure with cardboard pieces and glue all body panels securely into place.

Phase 5: Build the Fairy
Prepare:
-
Fairy template
-
Wings
-
Optional decorations

16. Glue the white section of the fairy dress into a cone shape.

17. Attach the wings to the back.

Phase 6: Final Assembly
18. Roll the thick double-sided tape and attach it to the center wooden dowel at the top of the body.

19. Place the fairy onto the tape.

20. Decorate your Spinning Fairy: however you like to make it magical and unique! ✨

Your Spinning Fairy is complete! 🧚
Spin the mechanism and watch your fairy twirl and fly through the air.

Success Checklist
-
Spin Check: Does the fairy rotate smoothly?
-
Movement Check: Do all moving parts turn together without getting stuck?
-
Balance Check: Does the fairy remain upright while spinning?
-
Mechanism Check: Can you turn the handle easily and repeatedly?
Get Your Templates
Sign up for free weekly templates delivered to your inbox. Unsubscribe at any time.
Show us your Spinning Fairy!
We'd love to see your magical creation come to life! Share a photo or video of your Spinning Fairy!
spinning and twirling on Instagram or TikTok, and tag us with #amomiiSSC.
PROJECT CREDITS
-
amomii Lead: Shaun
-
Graphics & Templates: Kelly
-
Video & Blog Content: Cindy & Vera


