

Did You Know?
Did you know that Earth Day is the world’s largest non-religious festival? It’s celebrated annually by over a billion people in almost 200 countries worldwide! It’s meant to bring awareness to issues such as climate change, and the need to cooperate to help protect our shared natural resources.

When to Celebrate
Earth Day falls on April 22nd every year. Because Earth Day started as a protest movement, that date was specifically chosen because it fell between spring break and final exams during the spring college semester, and was meant to allow students to more easily participate in demonstrations.
The Toolkit
To build your Recycligator, gather these supplies:
- The amomii Template: [GET THE FREE TEMPLATE HERE]
- Cardboard
- Double-Sided Tape
- Hot Glue Gun(Safety Tip: ASK an ADULT for help when using a hot glue gun.)
- Popsicle sticks (8.5 cm x 1.7cm)
- Barbecue Bamboo Skewers (or Bamboo Chopsticks), 3 pcs: S1(3cm), S2(5cm), and S3(10.5cm)
- Scissors & Craft Knife: (Safety First: Always ask an adult for assistance when using sharp cutting tools.)
The Build: Step-by-Step
Phase 1: Build the Bottom
1.Print and Prepare: Print the templates on A4 paper and gather all necessary materials.
-Safety Tip: ASK an ADULT for help when using cutting tools.

-Safety Tip: ASK an ADULT for help when using a hot glue gun.

-Safety Tip: ASK an ADULT for help when using a hot glue gun.

Phase 2: Build the Body
5.Prepare the Cover: Cut the cup horizontally 3 cm from the base. Then, cut a 3 cm x 2 cm opening into the sides.
-Safety Tip: ASK an ADULT for help when using cutting tools.
-Safety Tip: ASK an ADULT for help when using a hot glue gun.

Phase 3: Build the Top
7.Build the Pivot: Slide S2 through the small cardboard piece, then attach them to the cup.
-Safety Tip: ASK an ADULT for help when using a hot glue gun.
8.Attach the Support Rod: Glue the tail piece to S3 and thread it through the pivot area. Securely glue the rod to the popsicle stick at the base of the project.
-Safety Tip: ASK an ADULT for help when using a hot glue gun.
9.Attach the Lid: Glue the lid onto the pivot.
-Safety Tip: ASK an ADULT for help when using a hot glue gun!
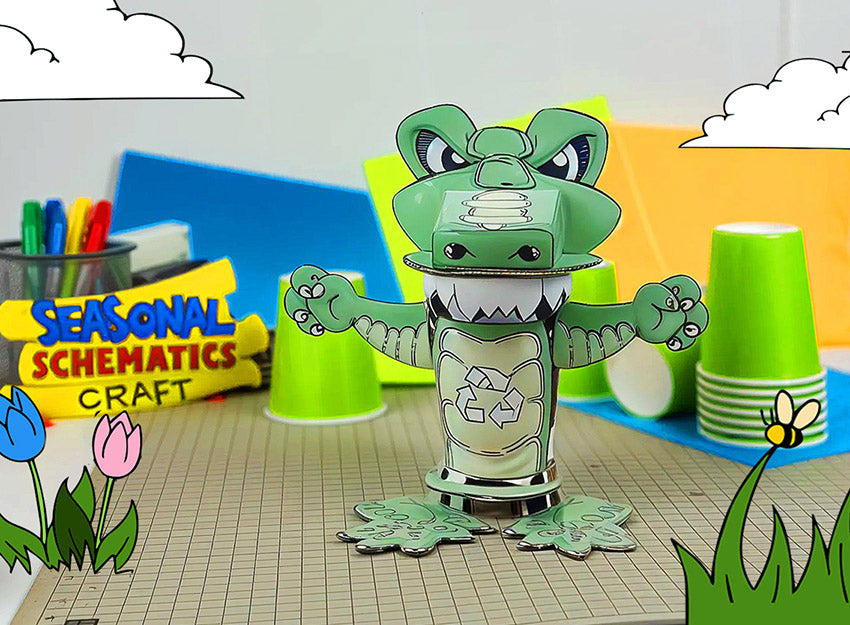
10.Decorate Recycligator: Apply the decorations to your project.
Your creation is complete! Use it to collect paper, plastic, or small metal items at your desk.
Happy Earth Day!
Success Checklist
Bottom Mechanism Check
Depress the plunger at the front of your Recycligator to ensure the lid opens easily and smoothly. You may need to adjust the length of S3 if the mechanism isn’t working to your satisfaction.
Get Your Templates
Sign up for free weekly templates delivered to your inbox. Unsubscribe at any time.
Show us your Recycligator!
Drop a comment below or share a video of your "Recycligator" to Instagram or TikTok and tag us with #amomiiSSC. We’d love to see your creativity in action!
Feel free to let us know what you think of the project or ask questions by leaving a comment below.
PROJECT CREDITS
- amomii Lead: Shaun
- Graphics & Templates: Kelly
- Video & Blog Content: Cindy & Vera


