

Did You Know?
Did you know that many of the traditions we associate with Halloween come from the ancient Celtic holiday Samhain? Samhain (pronounced SAH-win) marked the end of summer, which also happened to be the last day of the year. On that day, the Celts believed that the boundary between the worlds of the living and the dead was at its weakest, making it easier for spirits to invade our world.
To avoid these spirits, the Celts would dress in costumes to disguise their appearance and confuse them. In case that was ineffective, they would also offer food and gifts to ensure they didn't upset the spirits. During the Roman Empire, the holiday was merged with Feralia, a holiday also celebrated in late October that honored ancestors with gifts of food and drink.

When to Celebrate
Halloween takes place on October 31st every year. The name Halloween comes from All Hallows (meaning holy, or to honor as sacred) Eve (night before), which is in reference to All Saints' Day, a Catholic holiday celebrated the following day on November 1st.
The Toolkit
To build your Flying Flappy Bat, gather these supplies:
-
The amomii Template: [GET THE FREE TEMPLATE HERE]
-
Cardstock or Paper (Letter size or A4; use thicker paper for a stronger build)
-
Hot Glue Gun (or craft glue)
-
Scissors or a Craft Knife (Safety First: Always ask an adult for assistance when using sharp cutting tools!)
-
Hole punch
Materials Required
-
Cardboard (for the head, wings, and body)
-
1 Black Paper Cup (or use a plain paper cup and color it with a black marker)
-
Yarn (cut to various lengths as needed)
-
1 Long Wooden Dowel
-
2 Cardboard Circles (with center holes, for the hanger)
-
4 Small Magnets (used as counterweights)
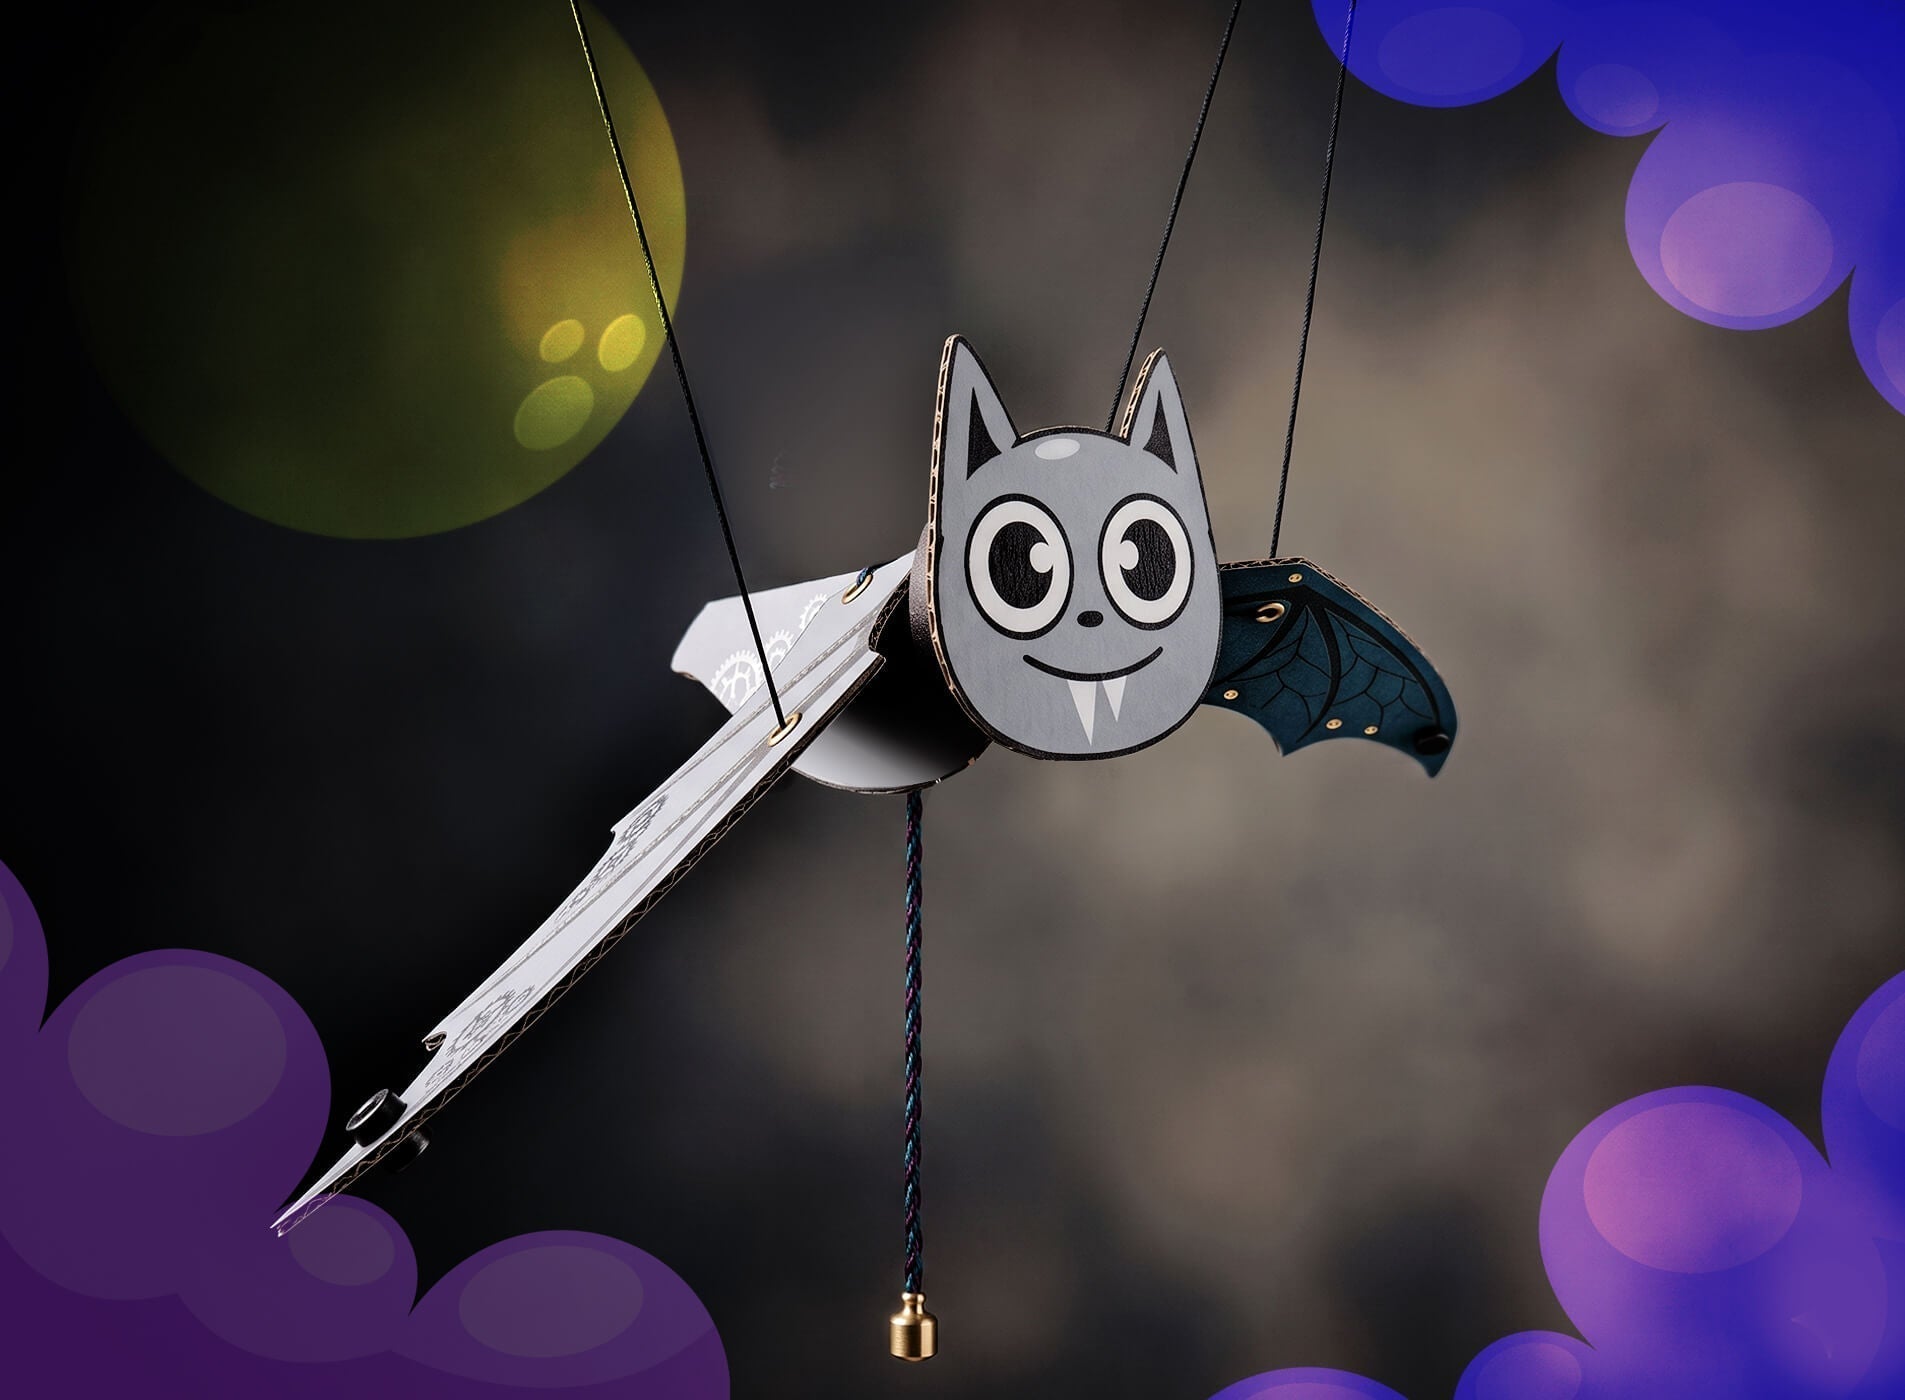
The Build: Step-by-Step
Phase 1: Print & Prepare
1. Print and Prepare: Print the template and carefully cut out all the pieces. Glue the head, body, and wing templates onto your cardboard for extra strength.

Phase 2: Build the Bat's Head
2. Prepare the Paper Cup: Cut off the top rim section of the paper cup as shown in the reference picture.

3. Color the Cup: Color the paper cup section black with a marker, or use a black paper cup if you already have one.

4. Attach the Head: Glue the colored cup section securely to the back of the bat's head template.

Phase 3: Build the Body
5. Cut the Body: Cut the center corners of the body piece exactly as indicated by the template lines.

6. Punch the Holes: Punch out all the marked guide holes in the body using a hole punch.

7. Add the Pull String: Flip the body over. Glue one side of the body together while placing a piece of yarn in the center.

8. Fold the Body: Fold the body in half. Then fold the center corner flaps outward as shown in the reference picture.

9. Attach the Head: Glue the completed head structure onto the front of the bat's body.

Phase 4: Build the Wings
10. Punch the Wing Holes: Use a hole punch to punch out all the marked holes on both wing pieces.

11. Thread the Main Wing Strings: Thread a long piece of yarn through the two outer holes on one wing. Insert the yarn from the back so that both loose ends come through to the front side.

12. Repeat for the Second Wing: Repeat the exact same threading process for the other wing piece.

13. Tie the Wing Ends: Tie the loose ends of the yarn on each wing.

14. Connect the Wings: Using short pieces of yarn, connect each wing to the body through the marked holes. Repeat for the second set of holes so both wings are securely attached.

Phase 5: Build the Hanger
15. Prepare the Hanger Components: Gather your long wooden dowel and the 2 small cardboard circles with center holes.

16. Install the End Stops: Slide one cardboard circle onto each end of the wooden dowel and lock them in place with glue.

17. Add the Hanging String: Tie a medium-length piece of yarn around the exact center of the wooden dowel, securing the knot tightly.

Phase 6: Final Assembly
18. Add the Weights: Attach two small magnets to the tip of each wing to act as counterweights.

19. Hang the Bat: Tie the wing string loops to both ends of the wooden dowel as shown in the reference picture.

Final Step
Your Flying Flappy Bat is complete! 🦇
Hang your bat by the center top string, then gently pull the center body string down to make the wings flap gracefully like a real flying bat!

Success Checklist
-
Flap Check: Do both wings flap smoothly and evenly when you pull the string?
-
Balance Check: Does the bat hang level and even from the wooden dowel hanger?
-
Weight Check: Are the magnets securely attached and helping the wings move naturally?
-
Connection Check: Are all yarn connections tied securely without any tangles?
Get Your Templates
Sign up for free weekly templates delivered straight to your inbox. Unsubscribe at any time.
Show us your Flying Flappy Bat!
We'd love to see your bat take flight! Share a photo or video of your Flying Flappy Bat on Instagram or TikTok and tag #amomiiSSC.
PROJECT CREDITS
-
amomii Lead: Shaun
-
Graphics & Templates: Kelly
-
Video & Blog Content: Cindy & Vera


