

Did You Know?
Did you know that Thanksgiving is in some ways responsible for modern convenience food? Back in 1953, the company Swanson & Sons overestimated demand and had over half a million extra pounds of frozen turkeys left over after Thanksgiving.
Needing a creative solution, Gerry Thomas had an epiphany. Inspired by the neat trays of food served on commercial airlines, Gerry ordered aluminum trays and portioned out the turkey meat, adding stuffing with gravy, peas, and sweet potatoes into individual, ready-to-heat meals.
Thus, the TV dinner was born! In its very first year, Swanson sold 10 million dinners, completely revolutionizing the modern food industry. They proved to be so incredibly popular that within just five years, American families were spending 500 million dollars on them annually, which is about 5.5 billion dollars in today's money!

When to Celebrate
Today, Thanksgiving is celebrated annually on the fourth Thursday of November. This wasn't always the case, though. There was a time when it was traditionally celebrated on the last Thursday of the month instead.
That meant in certain years, Thanksgiving could fall as late as November 30th. This late date frustrated retailers because it significantly shortened the Christmas shopping season. To solve this, Thanksgiving was officially moved in 1941 to ensure that the holiday weekend would always end by December 1st at the latest.
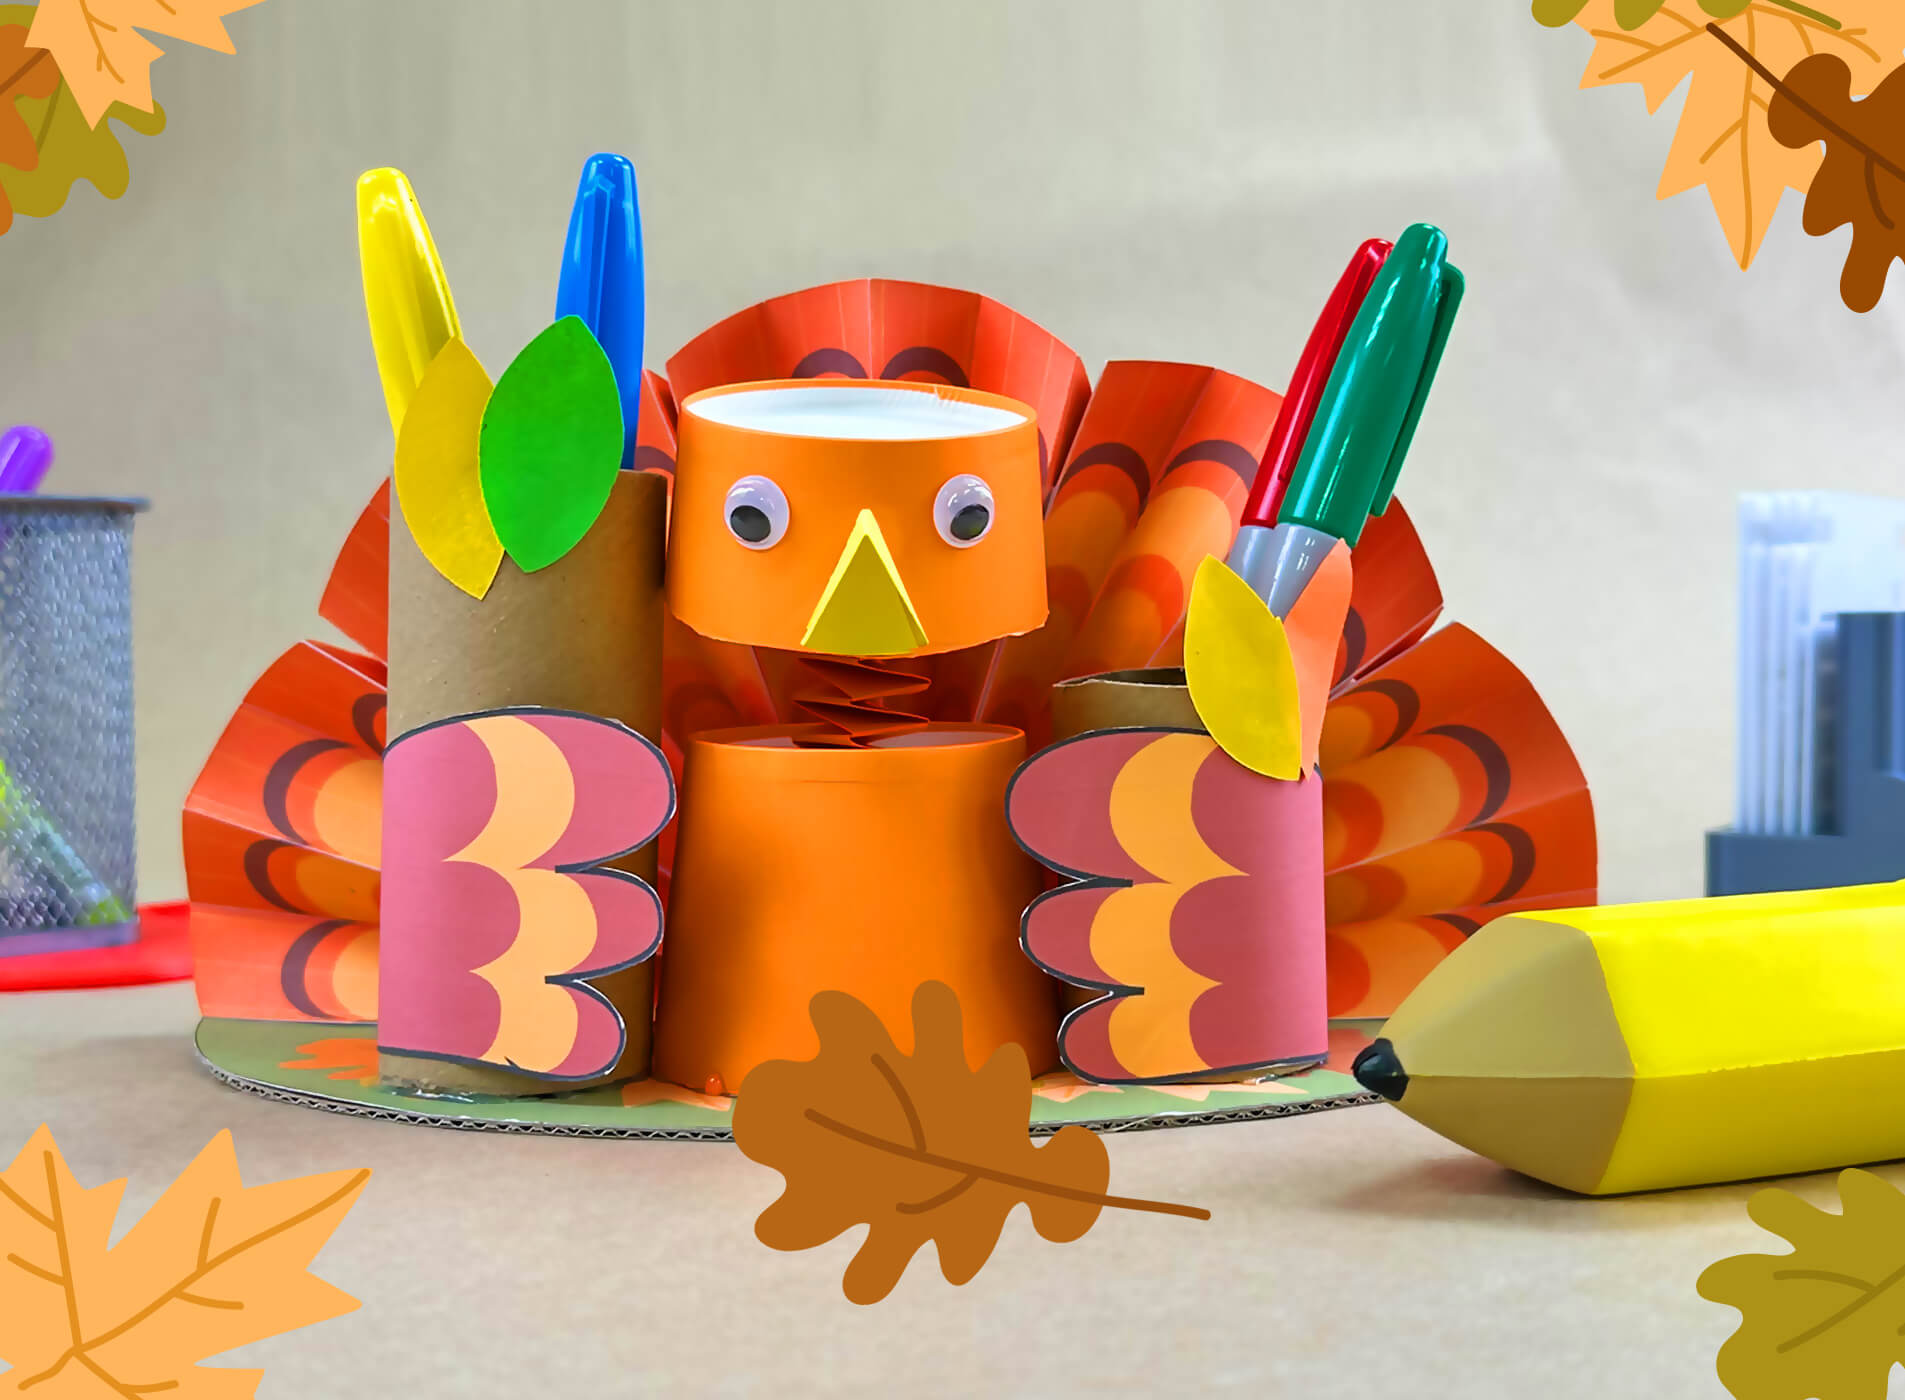
The Toolkit
To build your Turkey Pen Holder, gather these supplies:
-
The amomii Template: [GET THE FREE TEMPLATE HERE]
-
Cardstock or Paper: (Letter size or A4; thicker paper makes a stronger build)
-
Glue or Double-Sided Tape
-
Scissors or Craft Knife: (Safety First: Always ask an adult for assistance when using sharp cutting tools!)
Materials required:
-
2 Paper Strips (for the accordion paper spring)
-
2 Paper Cup Bottoms (1 shorter for the head, 1 taller for the body)
-
1 Cardboard Tube (cut a tissue roll tube into two pieces)
-
2 Doll Eyes
The Build: Step-by-Step
Phase 1: Print & Prepare
1. Print and Prepare: Print the template and carefully cut out all the pieces.

2. Create the Paper Spring: Take the two long paper strips and position them at a right angle. Fold the strips back and forth over each other to create an accordion paper spring, following the reference picture, and secure the end when finished.


Phase 2: Build the Turkey Body
3. Prepare the Body and Head
Gather:
-
The two paper cup bottoms
-
The paper spring

4. Connect the Head and Body: Glue one end of your paper spring to the center of the larger cup base (the body). Glue the other end to the smaller cup section (the head) to create a fun, bouncy turkey neck.

5. Make the Beak
-
Take the yellow circle paper, fold it in half, and then fold it in half again.

-
Cut along one of the folded creases as shown, roll it into a clean cone shape, and glue it securely.

6. Add the Face: Glue your completed cone beak and the googly eyes onto the turkey's bouncy head.

Phase 3: Create the Tail Feathers
7. Fold the Tail Feathers: Take one patterned feather strip and accordion-fold it back and forth along the guide lines to create a pleated fan shape.

8. Repeat: Repeat this process until you have 5 folded feather sections in total.

9. Connect the Feathers: Glue the 5 feather sections side-by-side to create one large, beautiful turkey tail fan.

10. Attach the Tail Base: Glue the pointed bottom center of your pleated tail fan to the straight edge of the green semi-circle base piece.

Phase 4: Assemble the Turkey
11. Attach the Body: Glue the bottom of the turkey's cup body directly to the center of the green base assembly.

Phase 5: Build the Pen Holders
12. Decorate the Tubes: Take the two cut cardboard tubes, wrap the turkey wing templates around them, and glue them down securely.

13. Attach the Holders: Glue the two decorated cardboard tubes onto the green base, positioning one on each side of the turkey body to become your pen holders.

14. Decorate: Add any extra colors, patterns, or creative decorations to make your turkey uniquely yours.

Your Turkey Pen Holder is complete! 🦃✏️
Fill up the side holders with your favorite pens, pencils, markers, or craft supplies, and display your festive turkey proudly on your desk!

Success Checklist
-
Spring Check: Does the turkey's head bounce playfully when you gently touch it?
-
Tail Check: Are all five colorful feather sections securely attached to the back?
-
Holder Check: Can the cardboard tubes hold your pens and pencils safely without tipping over?
-
Decoration Check: Did you add your own creative, personal touches to make your turkey unique?
Get Your Templates
Sign up for free weekly templates delivered straight to your inbox. Unsubscribe at any time.
Show us your Turkey Pen Holder!
We'd love to see your Thanksgiving creations! Share a photo or video of your Turkey Pen Holder on Instagram or TikTok and tag #amomiiSSC.
PROJECT CREDITS
-
amomii Lead: Shaun
-
Graphics & Templates: Kelly
-
Video & Blog Content: Cindy & Vera


